I've changed the page numbering requirements. Start numbering with page '1' on the top right of the title page & let the numbers go up from there.
a group project for Dr. Magee's English 303 - Technical Writing class
by Francis Ferrell, Tara Haggart, Maegen Kastner, Brent LeBlanc, and Katie Richmond
|
Step 1:
In Microsoft Word, pull down the View menu. Click on Header and Footer to toggle the display of headers and footers for editing. note: if your document already has a header or footer, this will simply display the Header and Footer Toolbar so you can edit your existing header/footer |
 |
 |
Step 2:
Click on either the header or footer, depending on where you want the page number to appear. In the Header and Footer Toolbar, click on the Insert Page Number button. note: You can use Word's usual text formatting tools (font size, bold, right justify, etc.) to format the page numbering as you see fit |
|
Step 3a:
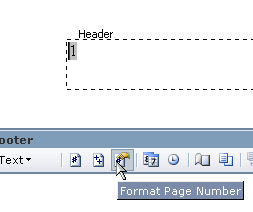
To change the page numbering style, click on the Format Page Number button in the Header and Footer Toolbar. |
 |
|
Step 3b:
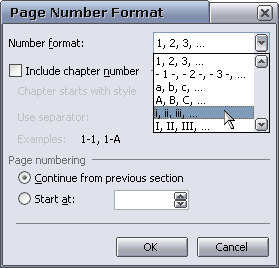
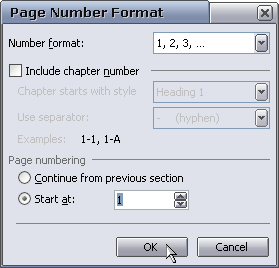
In the Page Number Format dialog box that pops up, you can change various aspects of the page numbering style. You can use the Number format drop down box to change how your page numbers are displayed (Arabic Numerals, Roman Numerals, Letters, etc.) |
 |
 |
Step 4a:
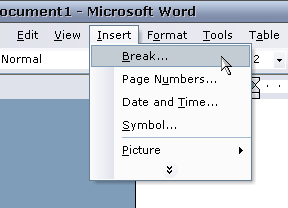
To change the number format and/or reset the numbering to 1 in the middle of your document, pull down the Insert menu and click on Break... |
 |
Step 4b:
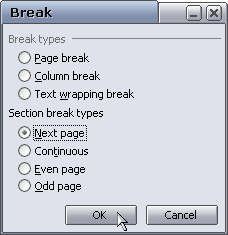
Under Section break types, select Next Page and click OK. note: make sure your cursor is at the end of the previous page before doing this, as any content after your current cursor position will be pushed to the next page when you click OK |
 |
Step 4c:
On the new page, click on the header or footer to highlight your page number. Then click on the Format Page Number button in the Header and Footer Toolbar as we did in Step 3a. You can now change the Number format and use the Page number settings to reset your page numbers to start at a specific number. note: this will only affect page numbers on the current page and pages that follow |