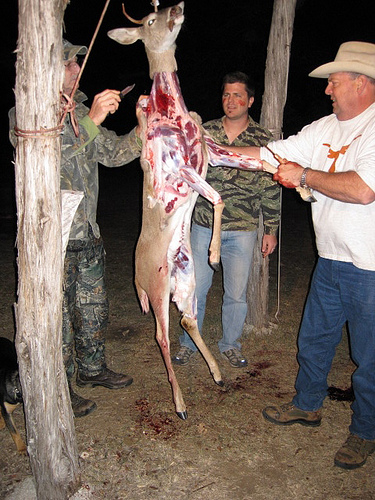
Hide Removal
Step two can be titled "Hide Removal". Begin by hanging
the deer according to the directions above. Next, take your gut hook
blade, and
using the bottom edge, make a circular incision all the way around the
neck.
This cut should be made approximately four to five inches below the
base of the
ear. Take care not to cut to deep for this could make hide removal more
difficult. An incision just deep enough to expose the meat is best.
Repeat this
process on all legs about 11 inches above the hoof. Soon after, take
the bottom
edge of the gut hook and slide its length under the hide on the front
leg.
Proceed from there cutting upward all the way from the circular leg cut
to the
neck cut made earlier. Repeat this process with the alternate leg. At
last, you
can begin to remove the hide from the flesh. Begin making short quick
slices while
pulling away at the hide. Continue this until the hide has been removed
down to
a hump on the rear end, where the tail bulges from underneath. Uponreaching the tail take your bone saw and make a circular cut, removing the tailbone and the rectum at one time. Once completed, continue removing hide until you reach the circular cuts on the back legs. At this time, the hide should be completely detached from the body.